![Flieber Logo Yellow Large.png]](https://help.flieber.com/hs-fs/hubfs/Flieber%20Logo%20Yellow%20Large.png?height=40&name=Flieber%20Logo%20Yellow%20Large.png)
Your Inbound shipments page already tracks the essentials: the Inbound shipment ID, SKU, quantity, expected delivery date, and whether each shipment is Open or Closed. But every operation has its own details worth keeping next to a shipment, whether that is the carrier, a tracking number, the freight forwarder, or a working status like in transit or at customs. Custom Columns let you add exactly those fields, so all of your shipment context lives in one place.
A Custom Column is simply an extra field you define yourself. Once you create it, Flieber shows it as its own column on the Inbound Shipments page, right alongside the standard fields, and you fill it in per shipment. It is there to inform you and your team, so it will not change your forecast or replenishment math.
First, choose how you enter your shipment information
Before you add your first Custom Column, tell Flieber how you prefer to enter the information for the shipments that are not connected to an integration. On the 'Inbound shipments' page, click the settings icon to the right of 'Edit manual shipments', then choose 'Configure inbound shipments input'.
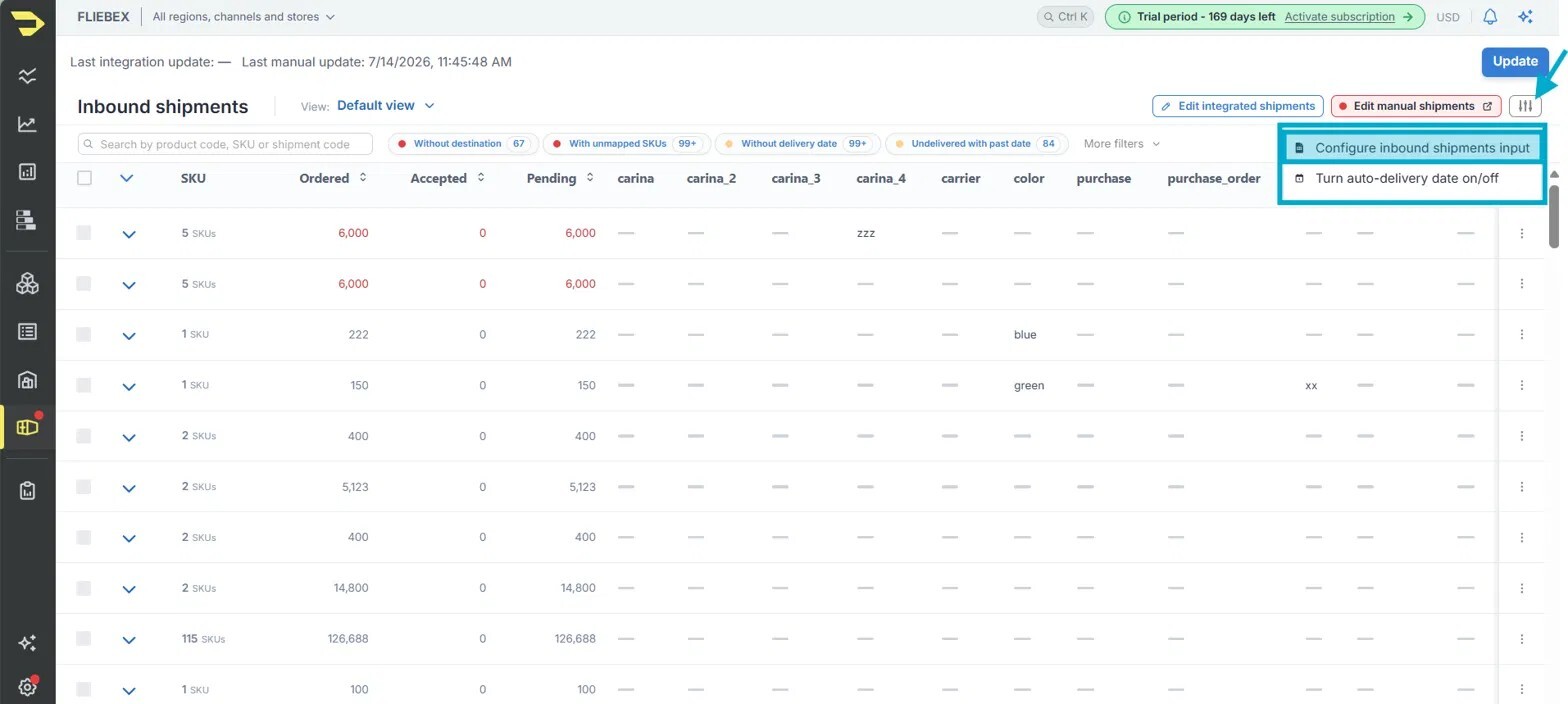
The settings icon sits to the right of 'Edit manual shipments'.
Flieber will then ask you to pick one of two options:
- In-app interface - use Flieber's own interface to add and edit your non-integrated shipment information.
- Google Sheets - use a Google Sheet instead. You will enter the Google account that should be granted access to the sheet.
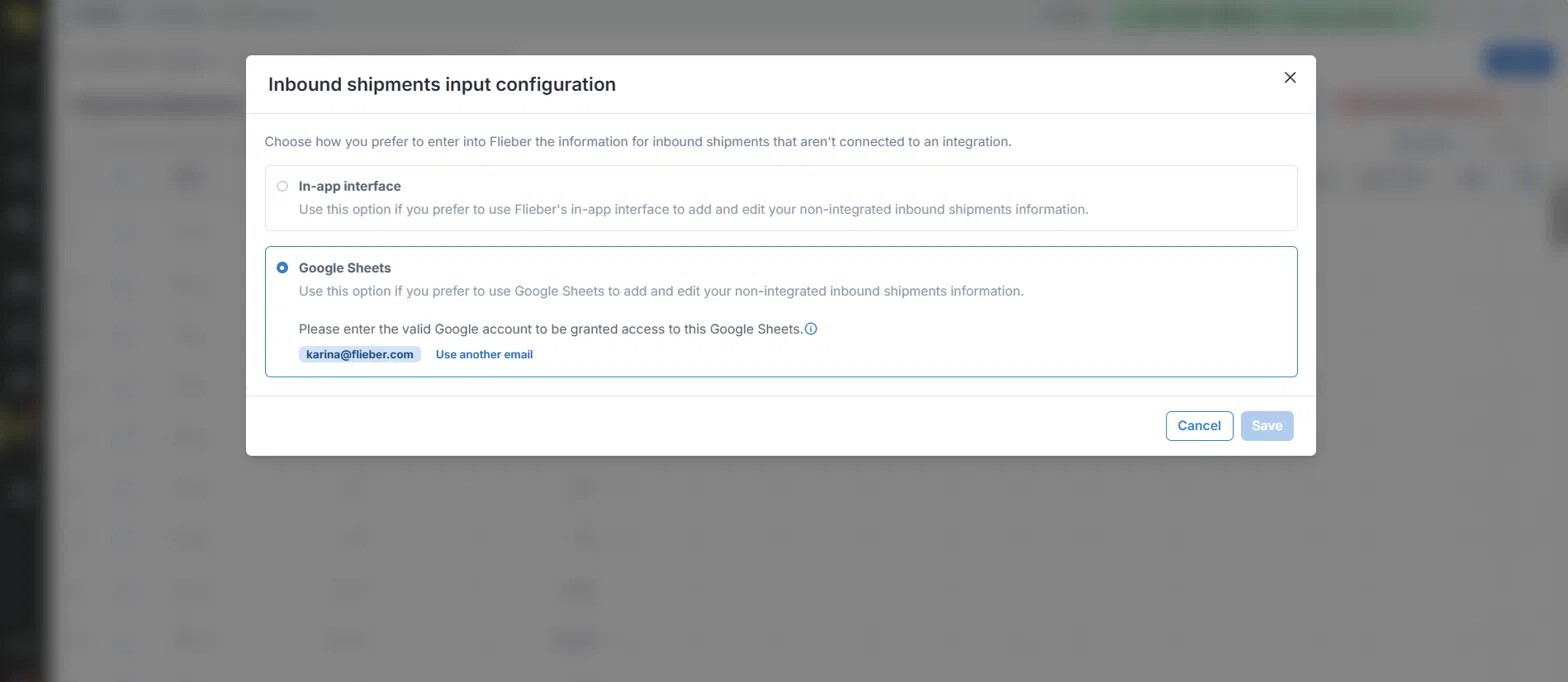
Pick whichever fits how your team already works, then save.
Then, add your Custom Column
If you chose Google Sheets, save your choice and click 'Edit manual shipments' to open your sheet. Add your attribute name in the next available blank column, then fill in a value for one of your SKUs. Come back to the 'Inbound shipments' page, hit refresh, and your new column will be there.
If you chose the in-app interface, save your choice and click the three dots at the end of the shipment row, in the last column, then enter the attribute name and its value. From there you can open 'Edit shipments' to fill in the rest of your shipments in bulk.
Once your Custom Column is in place, it behaves like any other column on the page. You can read it at a glance, sort and filter your shipments by it, and update it whenever your details change.
PRO Tip: You do not have to fill values one by one. Both the in-app table and the Google Sheet accept a bulk paste from a spreadsheet, so you can populate an entire Custom Column in seconds.
NOTE: The Column Manager, the columns icon above the table, shows, hides and reorders the columns you already have. It does not create them, so use one of the two paths above to add a new one.
The Two Paths at a Glance
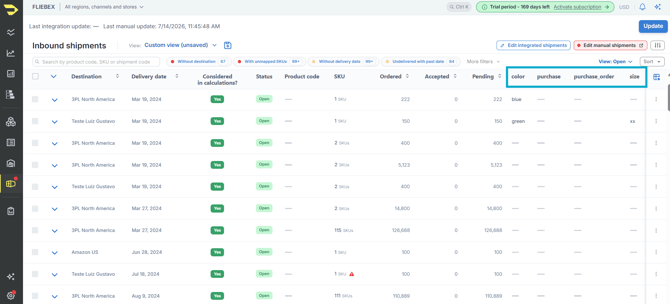
Whichever input method you choose, your Custom Column ends up on the Inbound shipments page.
If you have any questions or concerns, feel free to reach out to us by clicking on the chat in the lower right corner of Flieber.