![Flieber Logo Yellow Large.png]](https://help.flieber.com/hs-fs/hubfs/Flieber%20Logo%20Yellow%20Large.png?height=40&name=Flieber%20Logo%20Yellow%20Large.png)
Flieber's replenishment plans help you figure out precisely how many units you need to buy or move between locations, using your current inventory balance and your sales forecast. In this article, you will learn how to create a replenishment plan, adjust it to fit your needs, and convert it into shipments.
Creating your plan
To get started, log in to your account and navigate to the Inventory Forecast page. Here you can filter products by replenishment needs, purchases, or transfers, select specific items to simulate, or work from your entire catalog.
There are three ways to start a plan:
- Start Purchase Plan creates a plan for purchase orders,
- Start Transfer Plan creates one for transfer orders,
- Start Plan from Selection builds a plan around the specific products you've already selected.
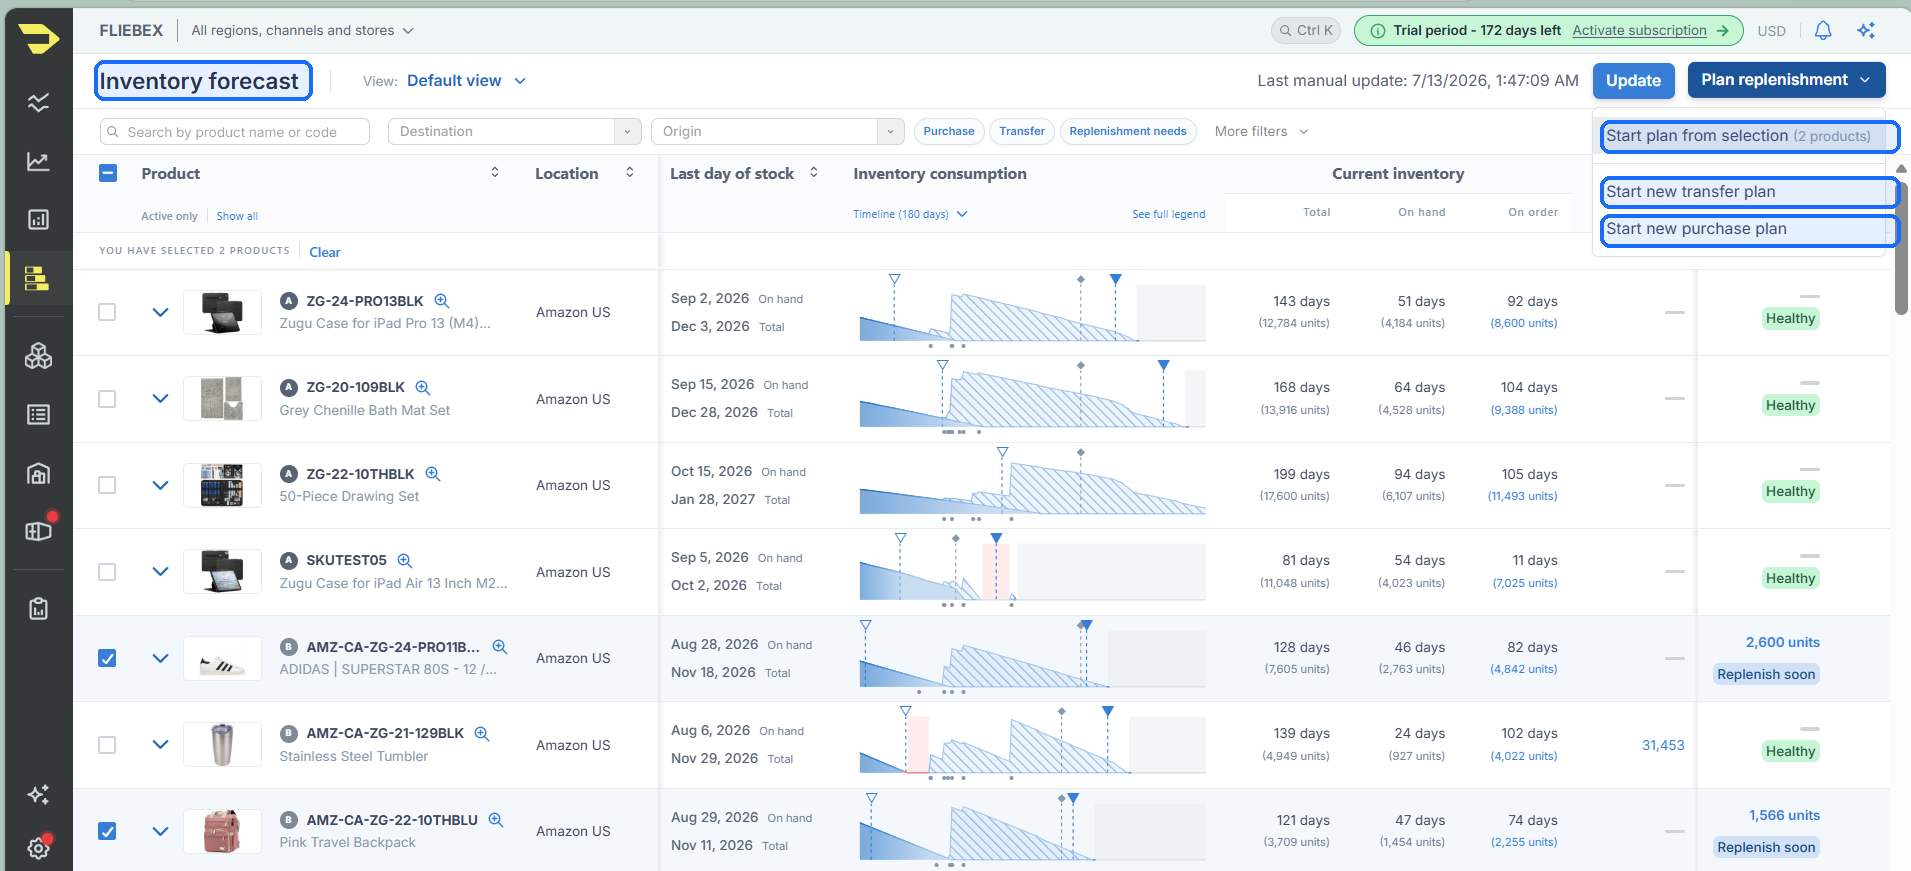
Choosing how to start your plan on the Inventory Forecast page: Purchase, Transfer, or from your selected products.
Whichever option you choose, every plan comes down to two fields: the Target arrival date, which is when you expect the inbound shipment to land, and the Days of coverage, which is how many days of sales you want that order to cover. If you've already selected your products, just fill in these two fields and you're set. If you haven't, you'll first set the destination for your plan and then fill in the same two fields.
Adjusting and saving your plan
Before finalizing, you can still fine-tune the plan. Adjust the suggested unit quantities up or down as needed, for example to meet a supplier's MOQ (Minimum Order Quantity), or round quantities to full cartons for easier handling and shipping. If your adjustments push you above your overstock threshold, Flieber displays an overstock alert to warn you that the new quantities will put you in an overstock position.
When your plan is ready, save it. It will then live on the Replenishment Simulations page, where you can access it anytime.
Converting your plan into inbound shipments
After the plan is created, it still won't impact your Inventory Forecast or replenishment needs until the inbound shipment is created.
Inside the plan, you can do this directly by clicking Convert to Shipments. If the plan has multiple destinations, different inbound shipments will be created, one per destination, and all of them will be linked to the same plan.
Only after the plan is converted into inbound shipments will Flieber consider those units as on-order quantity and recalculate the Inventory Forecast.
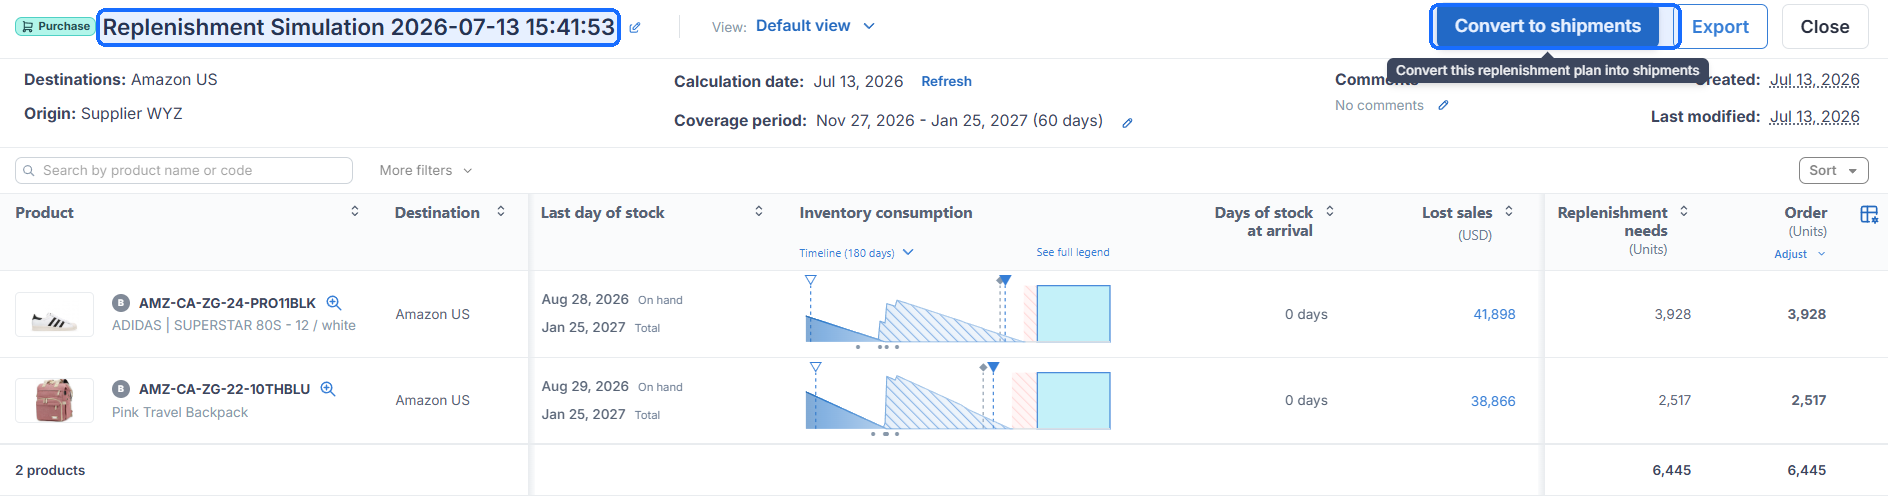
From the Replenishment Plans page, one click on Convert to Shipments turns your saved plan into inbound shipments.
PRO Tip: Once the plan is converted, inside the Inbound Shipments page, you can add the Replenishment Plan column to your view so you can quickly see which plan each shipment came from and jump back to it directly.
Note: If a calculation ever looks off, first confirm that your products have a forecast, configured Min/Max Days of Stock, and assigned Lead Times. Those three inputs are what every replenishment plan is built on.
Use Case Example
Here is the full flow at a glance, from opening the 'Inventory Forecast' page all the way to converting your plan into an inbound shipment.
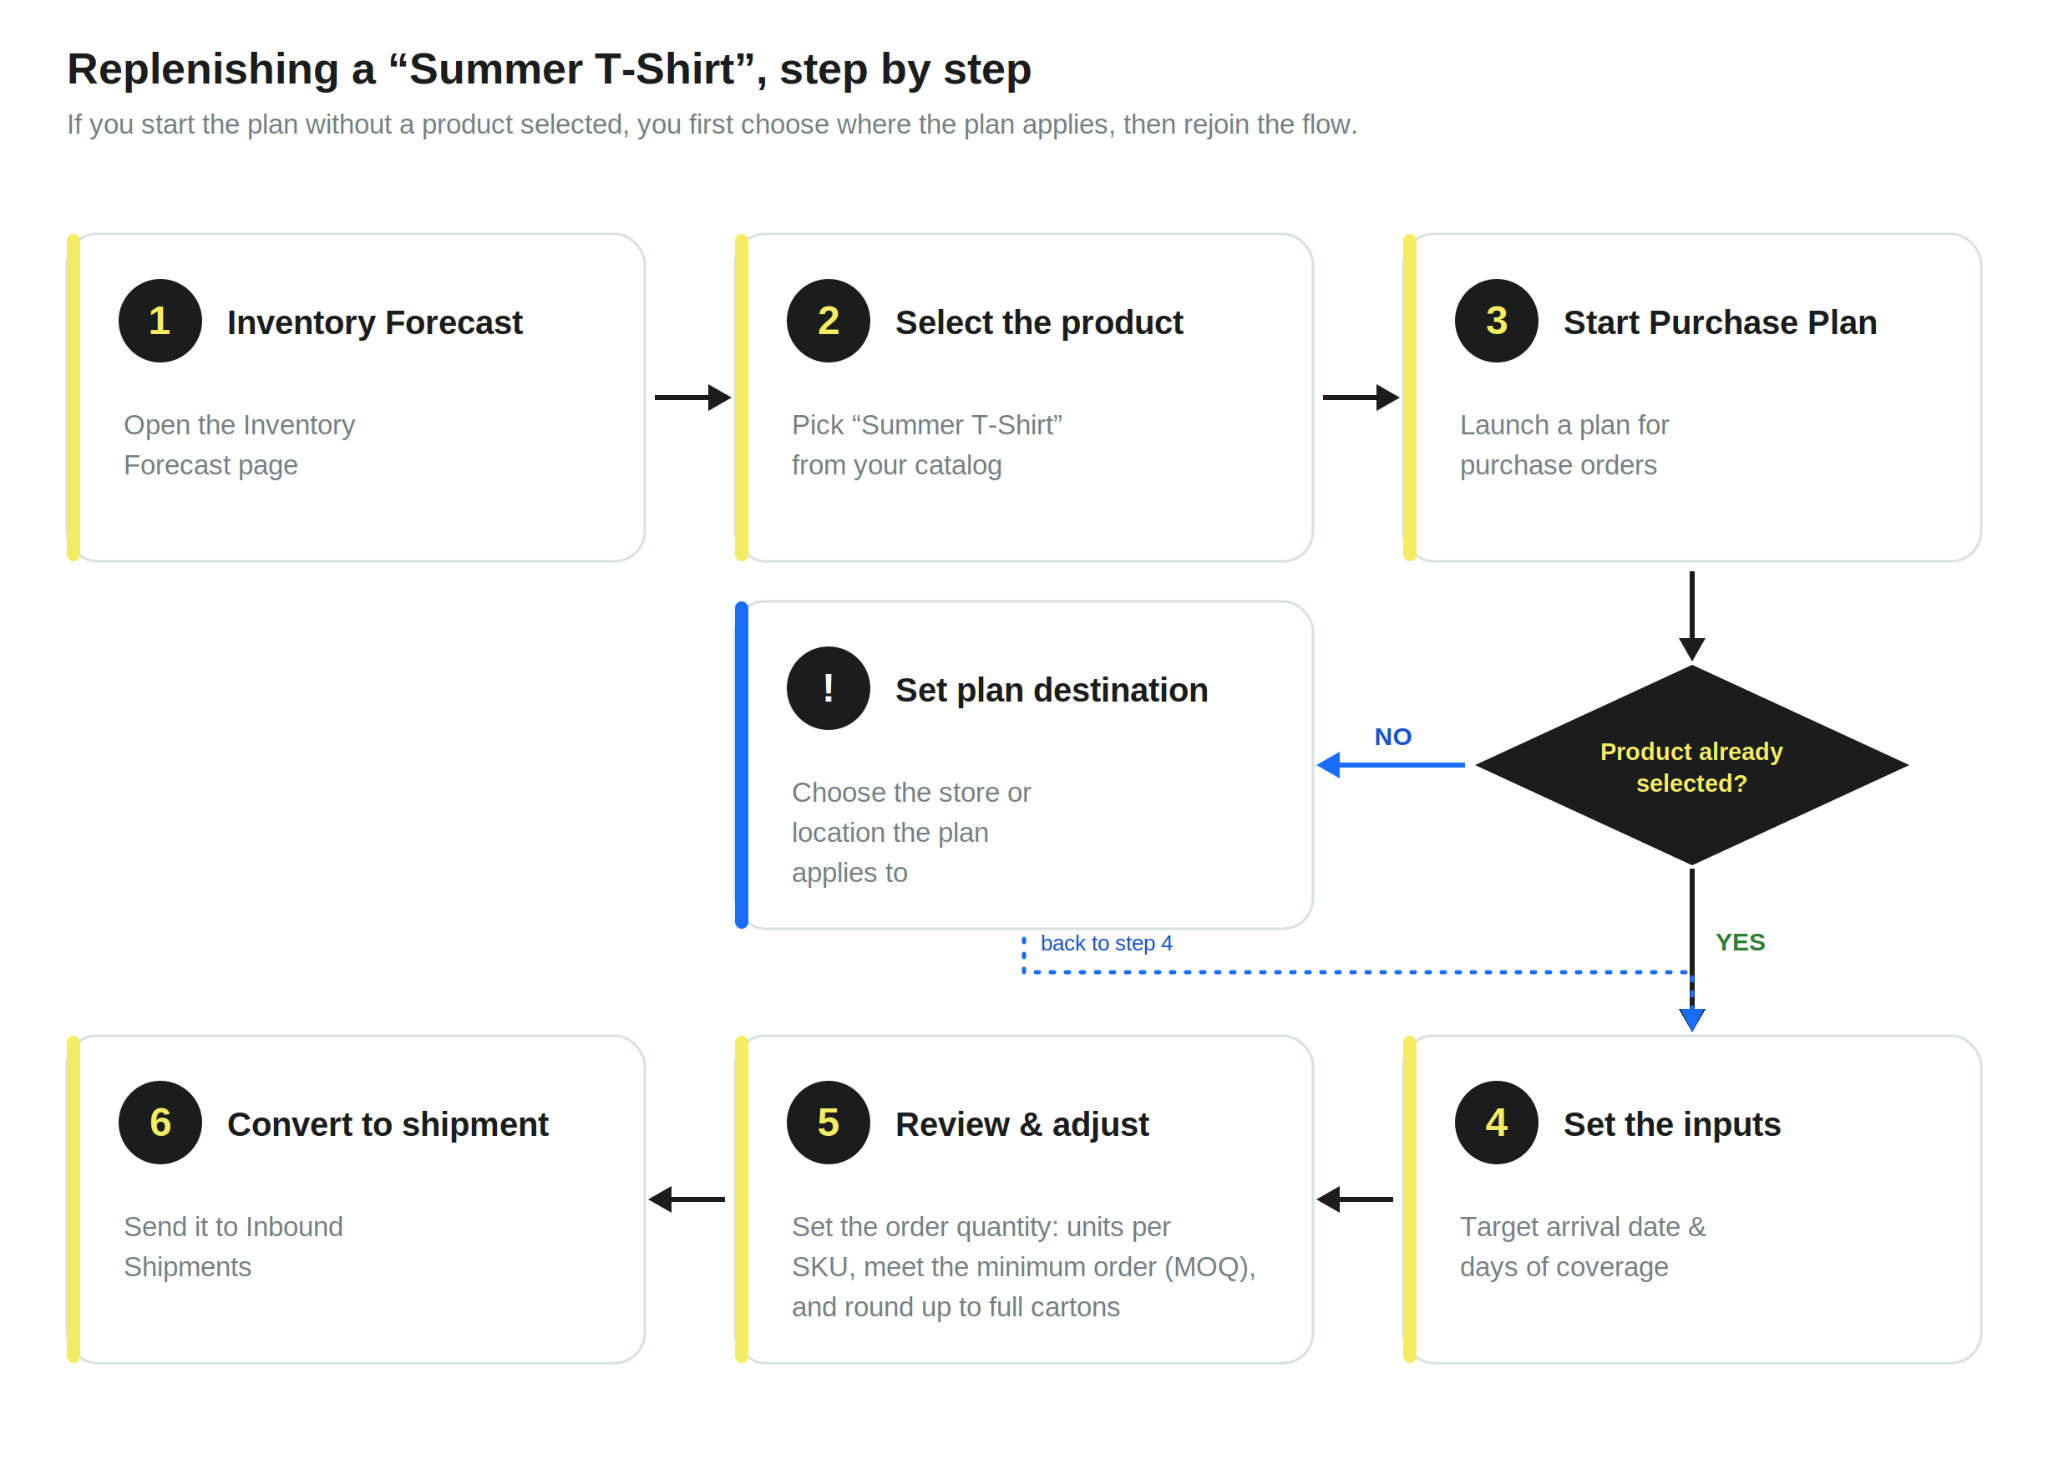
The full replenishment flow at a glance, from the Inventory Forecast page to an Inbound shipment.
If you have any questions or concerns, feel free to reach out to us by clicking on the chat in the lower right corner of Flieber.