1. Log into Flieber and navigate to the Integrations page
Click on "Account" on the top right, and then click on "Account Integrations".
Click on Oracle NertSuite's integration card at the top of the Account Integrations page.
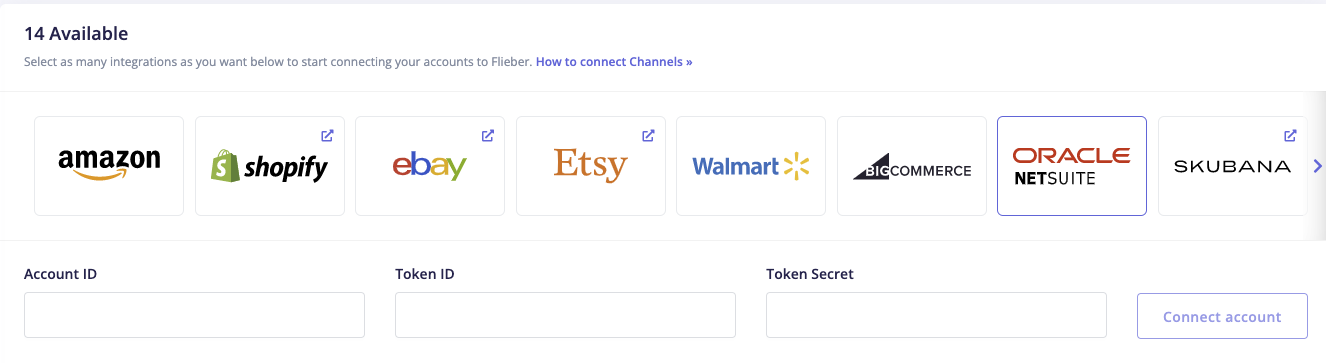
It will request for your 'Account ID', 'Token ID' and 'Token secret' credentials.
2. Set up integration in Netsuite
-
In order to get these fields, first navigate to your NetSuite login page and login with your email and password.
-
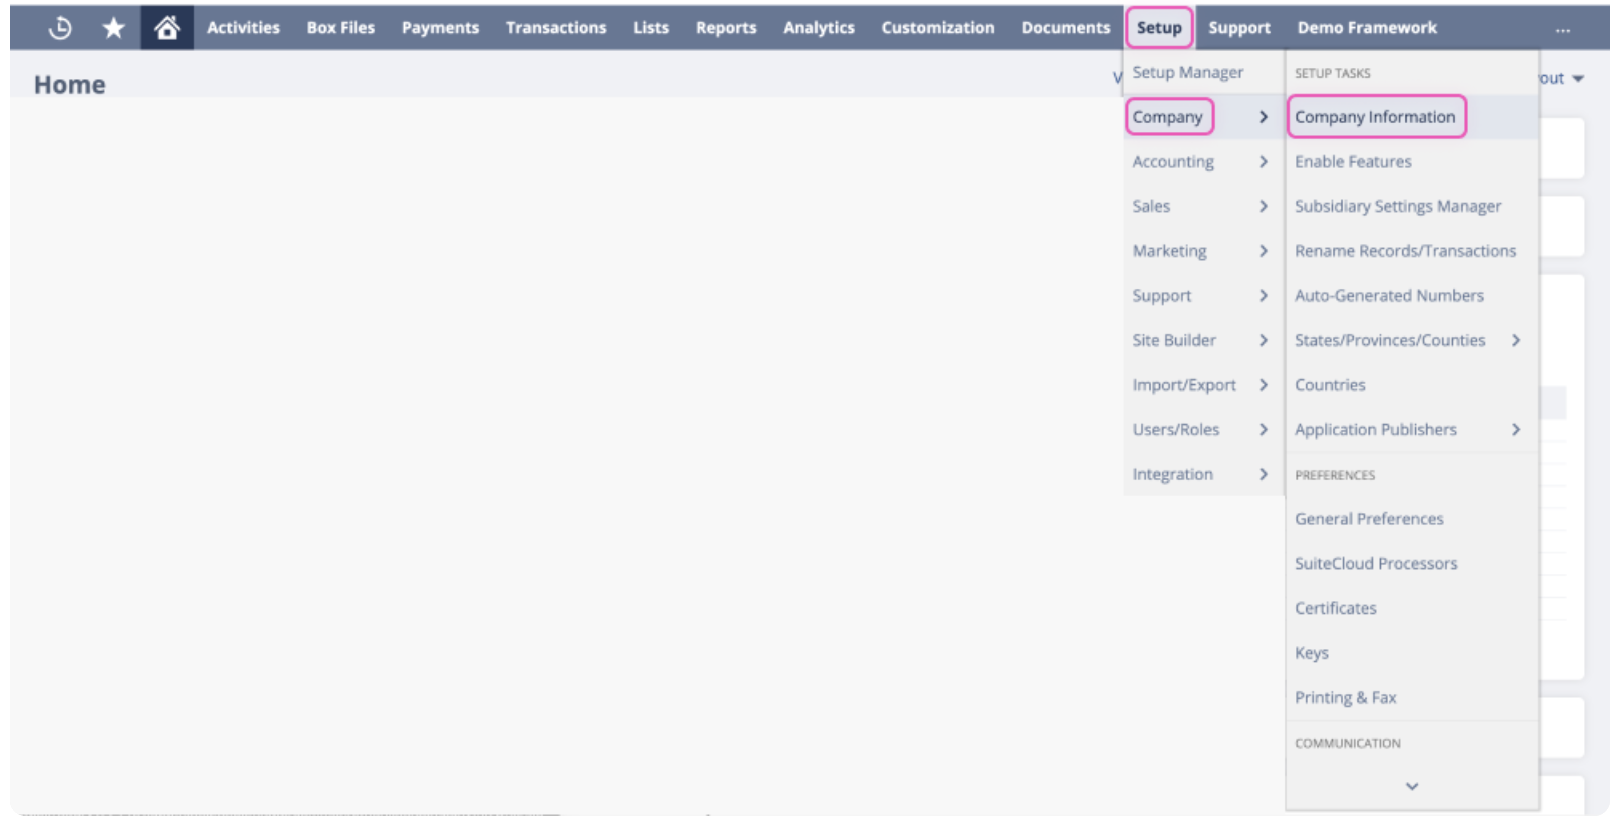
After logging in, head over to the 'Setup' tab, then select 'Company' and 'Company information' from the dropdown.
-
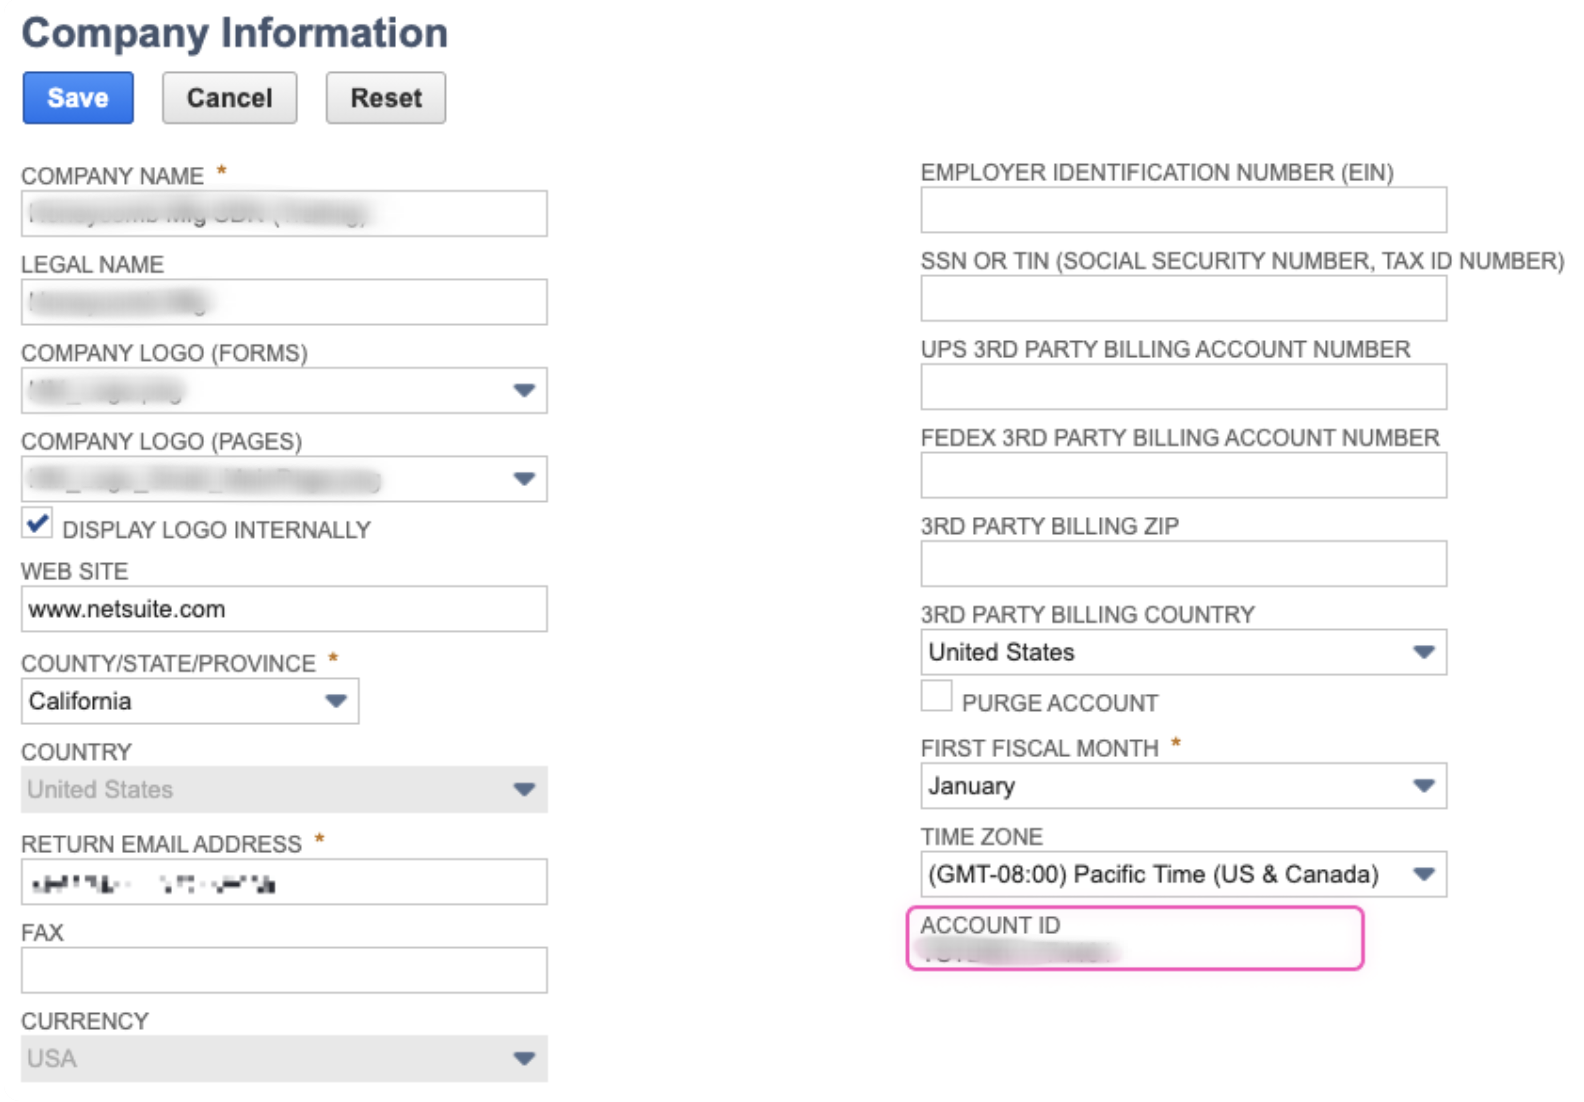
This will take you to another page where you can find your 'Account ID'.

-
Copy the 'Account ID' and share it with your Flieber Account Manager. We will enable you to install our app.
-
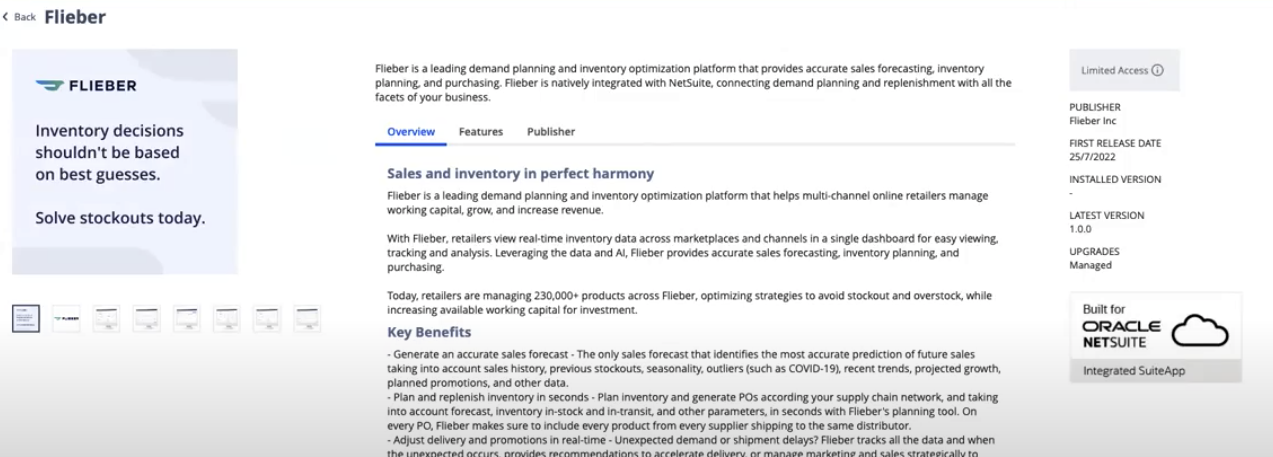
Next, navigate to 'SuiteApps' menu and search for Flieber.
-
If it shows 'Limited Access', it is because we haven't enabled it yet. Flieber NS app is controlled by Flieber because we currently have a guided onboarding.

-
If the 'Install' button is enabled, click on it and that will trigger the installation process.
-
-
To validate if the process was successful, navigate to:
'Setup' --> 'Integration' --> 'Manage Integrations'. There must be an Integration record for Flieber now. Click on it and enter to the Integration details.
3. NetSuite Features and Permissions
Enable features
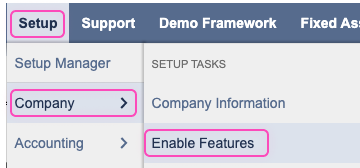
- To enable REST Web Services and the SuiteAnalytics Workbook features, navigate to the 'Setup' tab, then 'Company'. In the 'Setup Tasks' category click on 'Enable Features'.
- Under the 'SuiteCloud' tab, enable the following features:
Manage Authentication --> TOKEN-BASED AUTHENTICATION
SuiteTalk (Web Services) --> REST WEB SERVICES - Under the 'Analytics' tab, enable the following feature:
SuiteAnalytics Workbook --> SUITEANALYTICS WORKBOOK
Create user with proper permissions
To enable permissions for these features, navigate to the 'Setup' tab, then 'Users/Roles'. In the 'User Management' category, select 'Manage Roles'.
Either create a new role, or edit an existing role that you want to enable permissions for.
Ensure you have the following permissions in a role assigned to your user:
NOTE: You also have to make sure the user you use have access to all subsidiaries.
Transactions
|
Find Transaction |
Full |
|
Fulfill Orders |
Full |
|
Invoice Sales Orders |
Full |
|
Item Receipt |
Full |
|
Item Shipment |
Full |
|
Purchase Order |
Full |
|
Sales Order |
Full |
|
Transfer Order |
Full |
Reports
|
SuiteAnalytics Workbook |
Edit |
Lists
|
Currency |
View |
|
Custom Record Entries |
View |
|
Employee Record |
View |
|
Employees |
View |
|
Inbound Shipment |
View |
|
Items |
Full |
|
Locations |
Full |
|
Record Custom Field |
View |
|
Shipping Items |
View |
|
Subsidiaries |
View |
|
Vendors |
View |
Setup
|
Log in using Access Tokens |
Full |
|
REST Web Services |
Full |
|
SOAP Web Services |
Full |
ReportsCustom Records
|
Any record needed |
Full |
Once the user is created, contact the CSM team (clients@flieber.com) to setup a mapping session as part of the onboarding process.
4. Get auth data from NetSuite
-
The next step is to generate a user 'Token ID' and a 'Token Secret'.
-
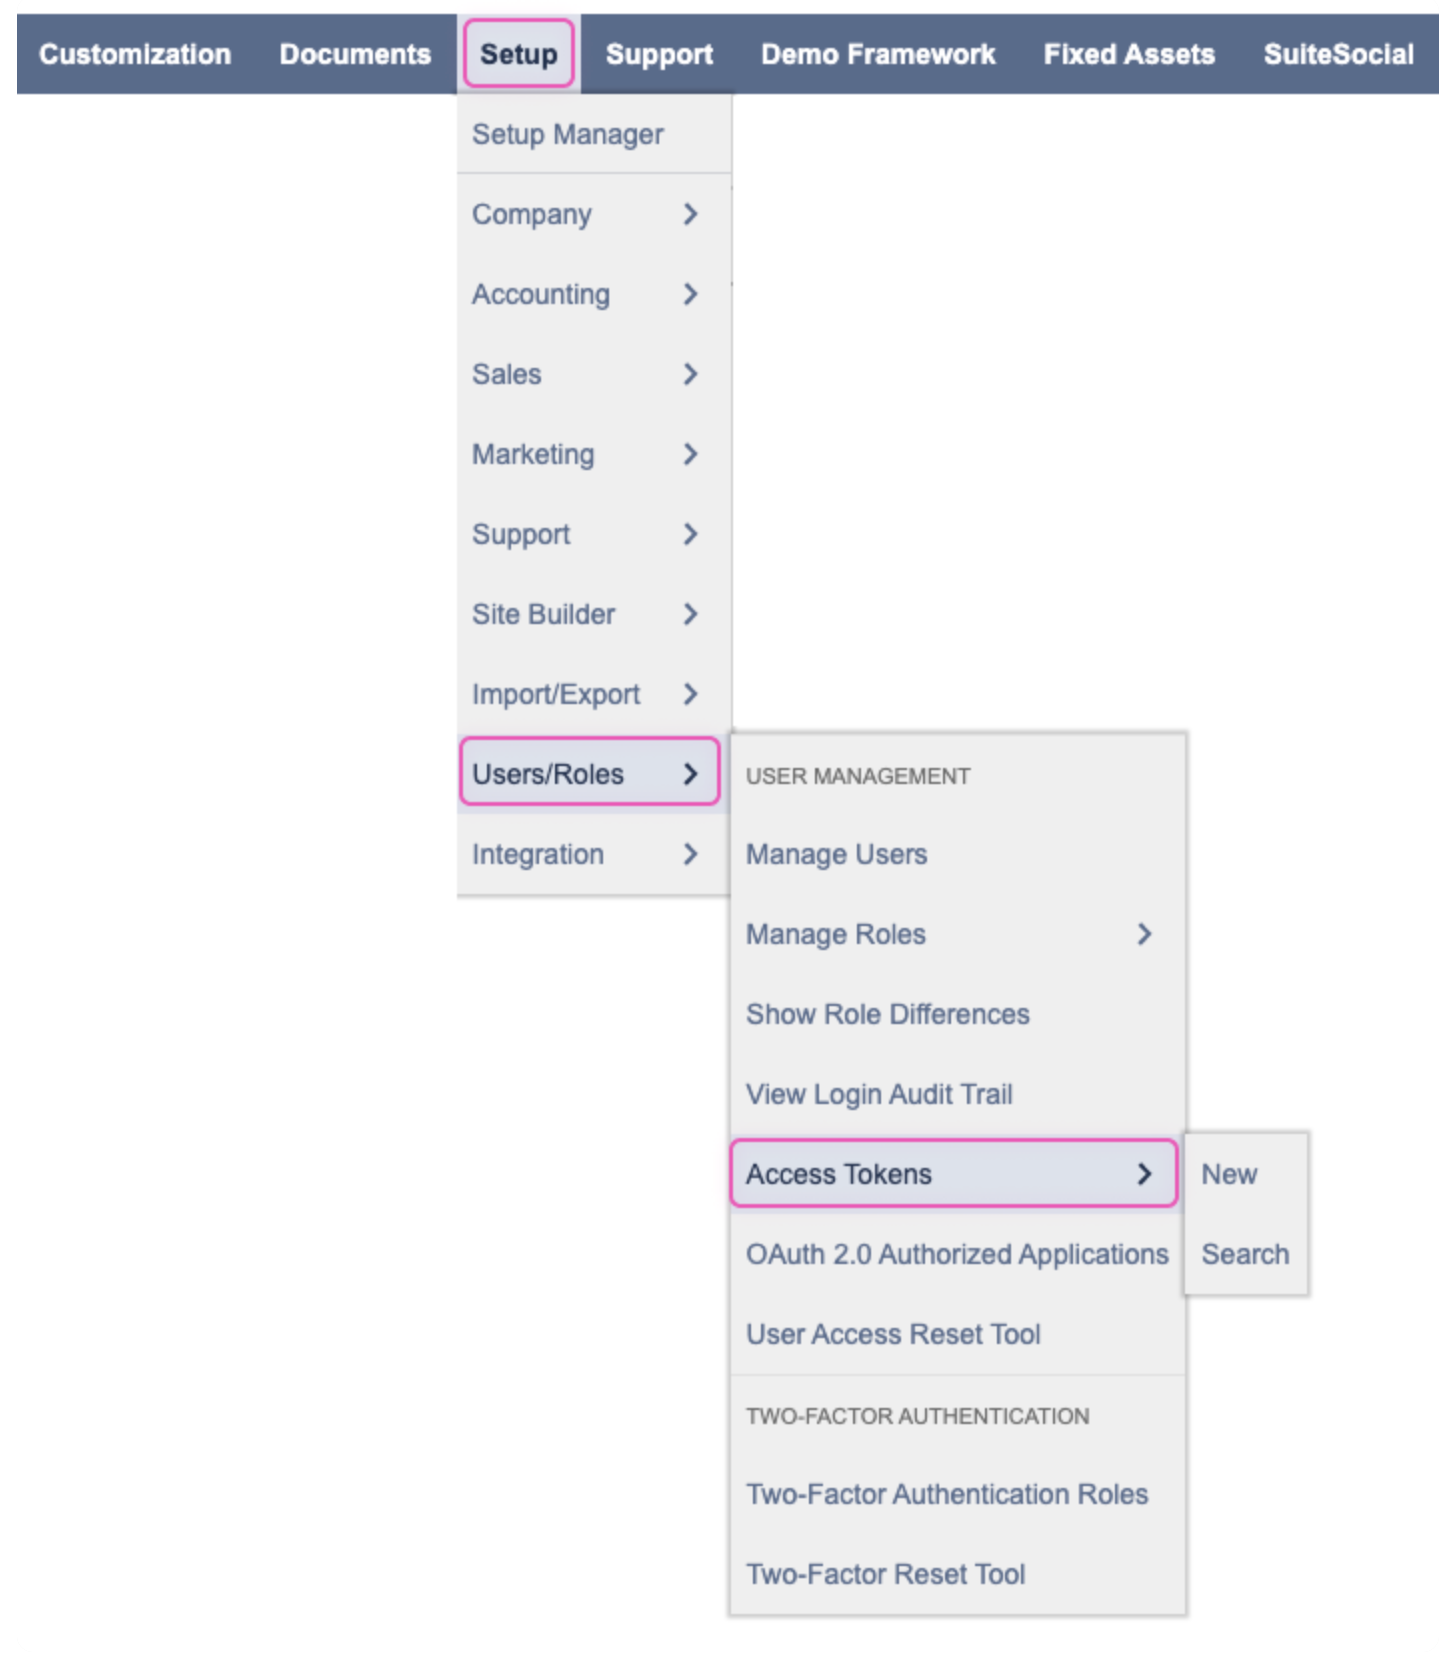
On the main dashboard, access the 'Setup' menu and navigate through 'Users/Roles' and 'User Management'.
-
Then select 'Access Tokens' from the dropdown.
-
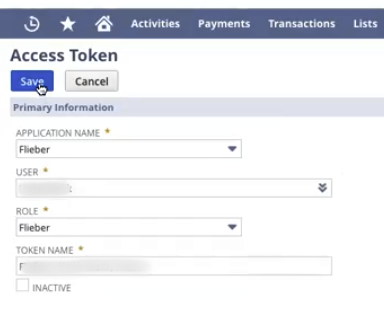
On the 'Access Token' page, select 'New Access Token'.
On the Access Token' page, select the 'Application Name' (of the integration record that you created earlier), select the 'User' and select the 'Role'.
-
The 'Token Name' is already populated by default with a concatenation of Application Name, User, and Role. Enter your own name for this token, if desired. Click 'Save'.
-
The confirmation page displays the 'Token ID' and 'Token Secret'.
Make a secure note of these values.
Warning: For security reasons, the only time the 'Token ID' and 'Token Secret' values are displayed is on the confirmation page. After navigating off this page, these values cannot be retrieved from the system. If you lose or forget these credentials, you will need to create a new token and obtain new values. Treat these values as you would a password. Never share these credentials with unauthorized individuals and never send them by email.
5. Navigate back to Flieber's Integrations page to complete setup
After filling out the information retrieved from NetSuite and clicking on 'Connect', you will see the integration listed like this:

Your NetSuite Integration is configured and Inventory data will be pulled from NetSuite!
If there are any questions or concerns, click on the chat bubble in the lower right corner within Flieber or send an email to clients@flieber.com.