

1. Create a user in the developer Portal
To use any of Flieber's APIs, create a Developer Account in our developer portal. A Developer Account provides an API Key for accessing our APIs, including a playground for testing, as well as the API usage metrics. Register or sign in using the buttons in the top right of that page where you can also find a more detailed guide about our public APIs.
2. Select Flieber API integrations
This step can be completed by any admin user with access to Flieber, and does not necessarily require the developer to have access to Flieber.
On the integration page, scroll sideways on the carousel and select the Flieber API option

3. Fill Public API information
Account name: Used to identify the integration in your Flieber account. It will be displayed as an option in the top filter bar.
Flieber Developer Email: This is the email address used to register on the Developer Portal.
Region: Select the region where you will associate products and orders to (i.e. United States, UK, Germany).
Integration Scopes: Forecast, Inventory, Sales Orders (Deliveries - coming soon). Choose the scope of your integration.
-
Only connect 'Sales Orders' scope when planning to send sales orders to Flieber's API. If this is the case, a new Selling Account will be created and additional charges may be applied to your subscription. Not all connections require it
4. Connect with Public API
Once all the requested information is filled out, a modal will be shown with 3 important parameters:
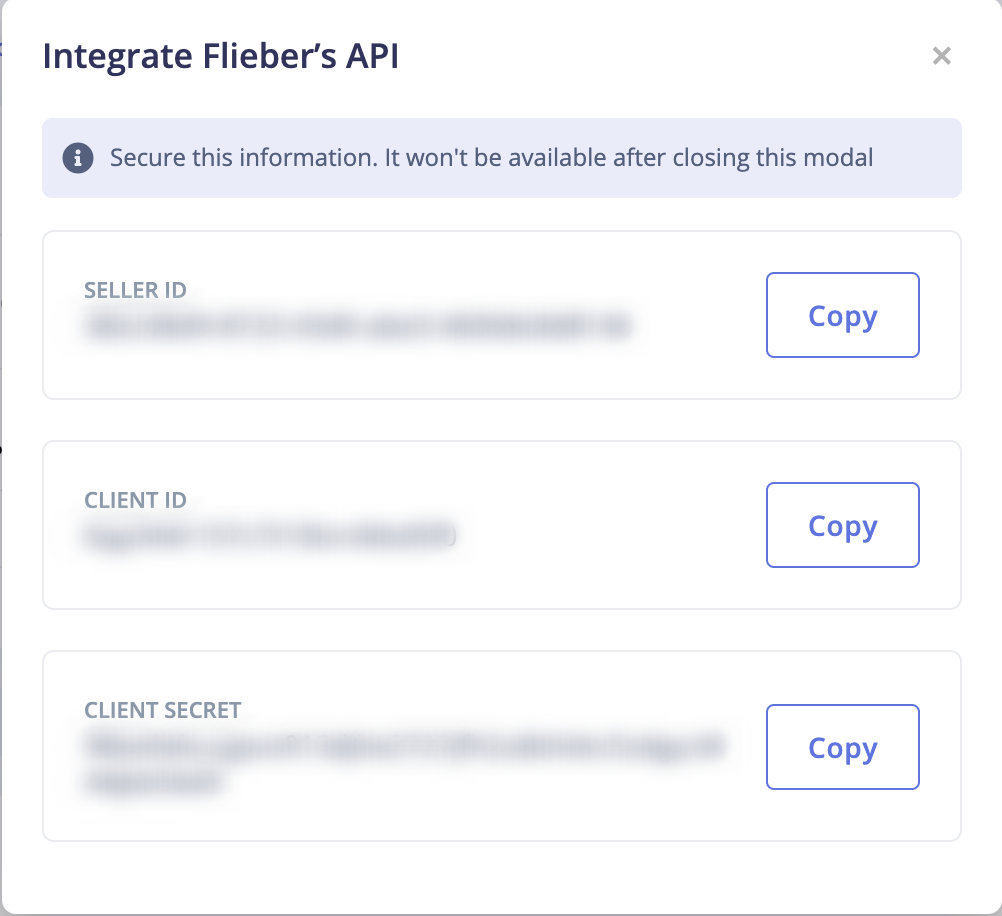
Seller ID: this is the ID of the your seller integration. All the data ingested from the API will be assigned to this seller in Flieber and you will have to send this parameter to pull or push data to our API.
Client ID: This is the ID assigned to your user in our API. You will have to send this parameter along with the client secret when calling the /authentication endpoint in order to get the token needed for the rest of the endpoints.
Client secret: The secret assigned to your user. You will have to send this parameter along with the Client ID when calling the /authentication endpoint in order to get the token needed for the rest of the endpoints.
5. You are ready to test!
-
Use the authentication endpoint to get the bearer token
-
Use the token and your API Key (given in the Developer Portal) to call all the endpoint.